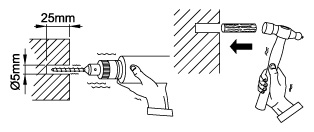
| Heater Installation |
 |
SAFETY PRECAUTION This sign warns of serious injury, damage to property and potential death. Before operating, please read the following “Safety Precautions” carefully. |
|
|
|
IMPORTANT
|
|
 |
|
|
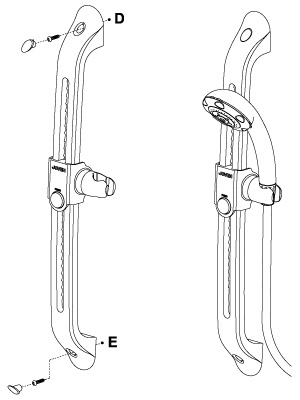
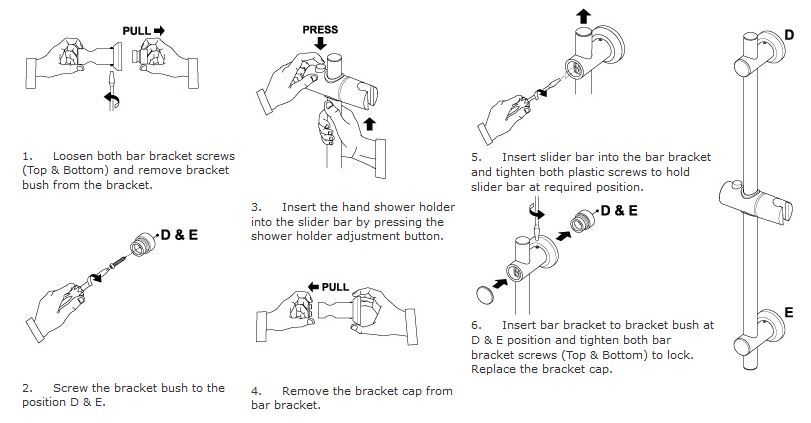
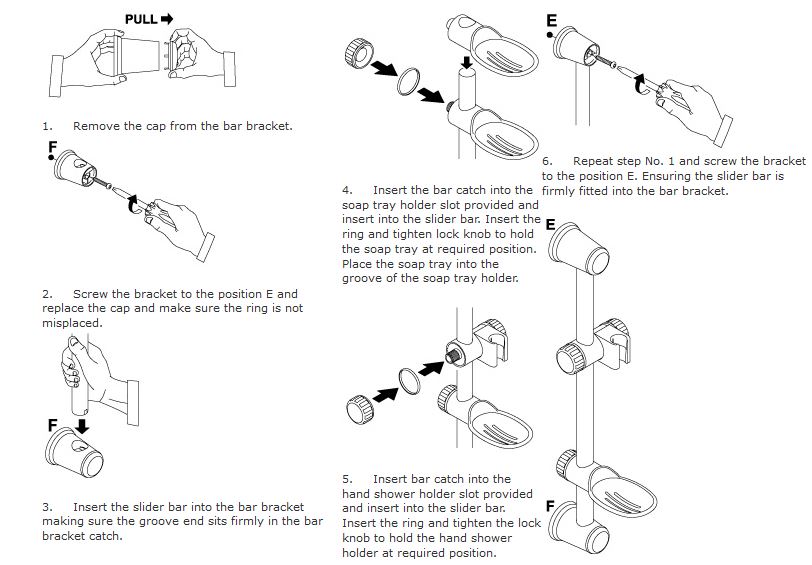
| Slider Installation |

| Plumbing Connection |
.jpg) |
IMPORTANT
|
.jpg) |
|
|
|||
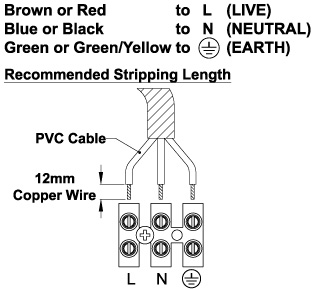
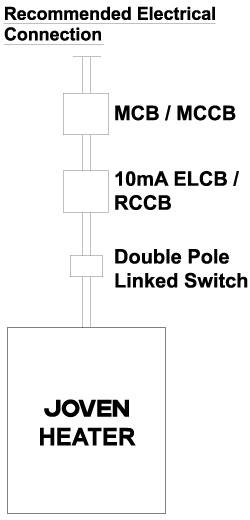
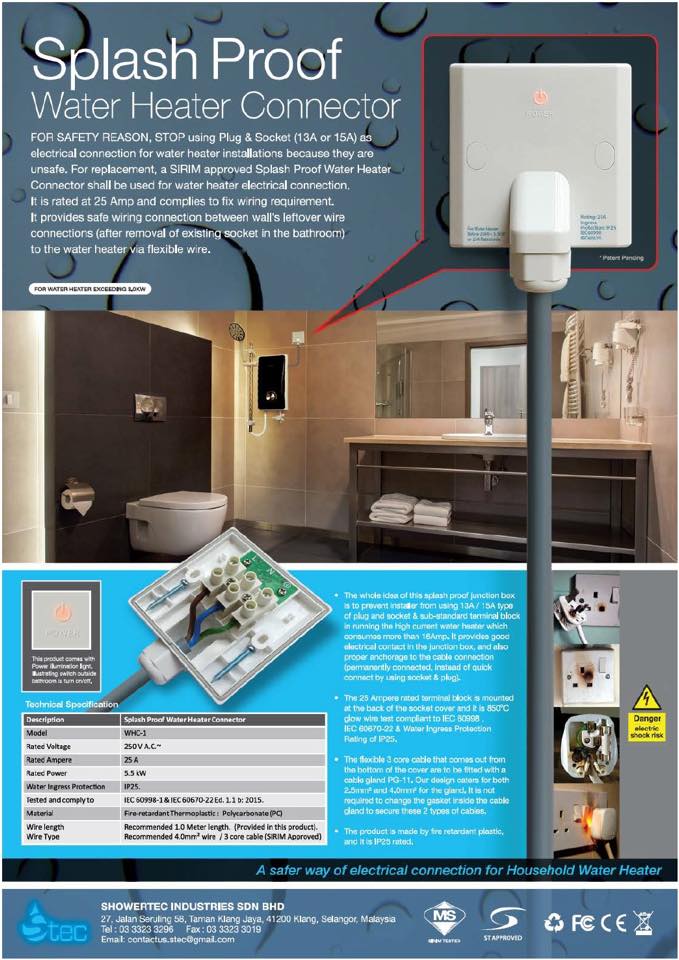
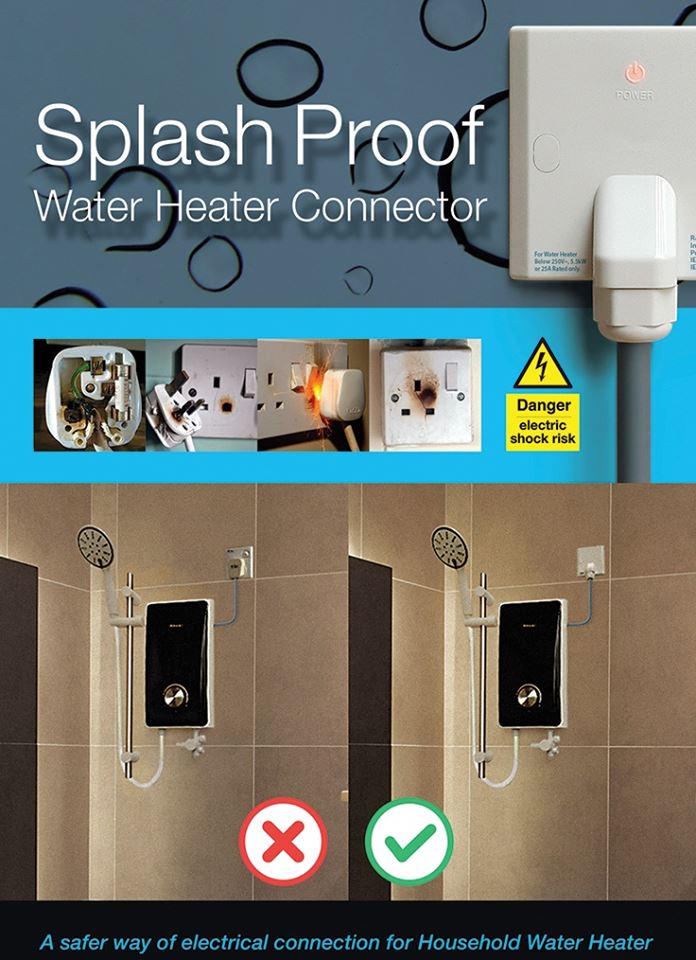
| Electrical Connection |
|
|
IMPORTANT
|
|
| HEATER ELECTRICAL LOADING | MINIMUM CONDUCTOR SIZE | RATED CURRENT FOR CIRCUIT BREAKER / DOUBLE POLE LINKED SWITCH (A) | |||||
|
Voltage (Va.c.) |
Power (kW) |
Current (A) |
Conductor Size (mm2) |
Conduit Cable (No./ Ømm) |
Flexible Cable (No./ Ømm) |
||
|
220 50 / 60 Hz |
2.2 | 10 | 2.5 | 7 / 0.67 | 50 / 0.25 | 16 | |
| 3.3 | 15 | 2.5 | 7 / 0.67 | 50 / 0.25 | 20 | ||
| 3.5 | 16 | 4.0 | 7 / 0.85 | 56 / 0.30 | 20 | ||
| 4.4 | 20 | 4.0 | 7 / 0.85 | 56 / 0.30 | 25 | ||
| 5.2 | 24 | 6.0 | 7 / 1.04 | - | 32 | ||
|
230 50 / 60 Hz |
3.0 | 13 | 2.5 | 7 / 0.67 | 50 / 0.25 | 20 | |
| 3.3 | 15 | 2.5 | 7 / 0.67 | 50 / 0.25 | 20 | ||
| 3.6 | 16 | 4.0 | 7 / 0.85 | 56 / 0.30 | 20 | ||
| 4.8 | 21 | 6.0 | 7 / 1.04 | - | 25 | ||
|
240 50 / 60 Hz |
3.3 | 13.8 | 2.5 | 7 / 0.67 | 50 / 0.25 | 20 | |
| 3.6 | 15 | 2.5 | 7 / 0.67 | 50 / 0.25 | 20 | ||
 |
|
| Operating Procedure |
|
|
IMPORTANT
|
|
|
||

BWS Sales & Services Sdn Bhd is specialized in Solar Water Heater, Water Pressure Pump, Water Filtration System and Swimming Pool for both residential and commercial market in single unit or bulk order. Our main office is located in Seri Kembangan, Selangor, Malaysia.